

How To Set Up Two Screens On Windows
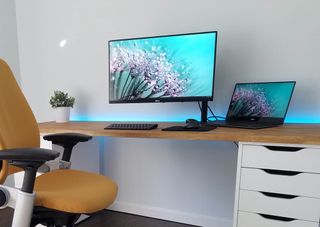
Whether you're content creator, developer, data analyst, gamer, or someone who's recently been forced to piece of work from dwelling, a system with multiple monitors non only looks great, merely it tin can significantly improve productivity when multitasking with several apps. Nevertheless, a multi-monitor setup is but practical as long equally y'all configure it correctly.
Windows x has several features and settings to support one, two, three, four, and fifty-fifty more monitors without the need for 3rd-party software for the best experience.
In this Windows ten guide, nosotros'll walk you through a bunch of tips to configure and use a multi-monitor setup, whether you're connecting an external display to your laptop, or you're connecting two, three, or more monitors to your workstation.
- Before configuring a multi-monitor setup
- How to rearrange multiple displays on Windows x
- How to adjust displays scale and layout on Windows 10
- How to select multiple displays viewing style on Windows 10
- How to manage avant-garde display settings on Windows 10
- How to bear witness taskbar beyond multiple displays on Windows 10
- How to change background on multiple displays on Windows 10
Before configuring a multi-monitor setup
Before configuring multiple monitors on your device, make sure that all the necessary cables are connected to the monitors and the calculator. This includes connecting power and video bespeak using VGA, DVI, HDMI, or DisplayPort (recommended) cables.
If you're non certain, confirm the make and model of the monitor (usually from a sticker in the back), and search online for the manufacturer manual to get a ameliorate idea on how to connect the display.
How to rearrange multiple displays on Windows 10
While y'all tin connect a monitor to any bachelor video ports on the graphics bill of fare, when setting upward a dual-monitor or triple-monitor setup, it's easy to plug them in the incorrect order. Although they volition still work, you lot may run into issues using the mouse and running applications until you rearrange them correctly.
To rearrange monitors on Windows x, use these steps:
- Open Settings.
- Click on System.
- Click on Display.
- Under the "Select and rearrange displays" section, drag and drop each display to rearrange them according to their physical layout on your desktop.Quick tip: When rearranging monitors in the "Brandish" settings page, make sure that all monitors align at the top perfectly. Otherwise, you'll have issues moving the mouse cursor between monitors from the corners.
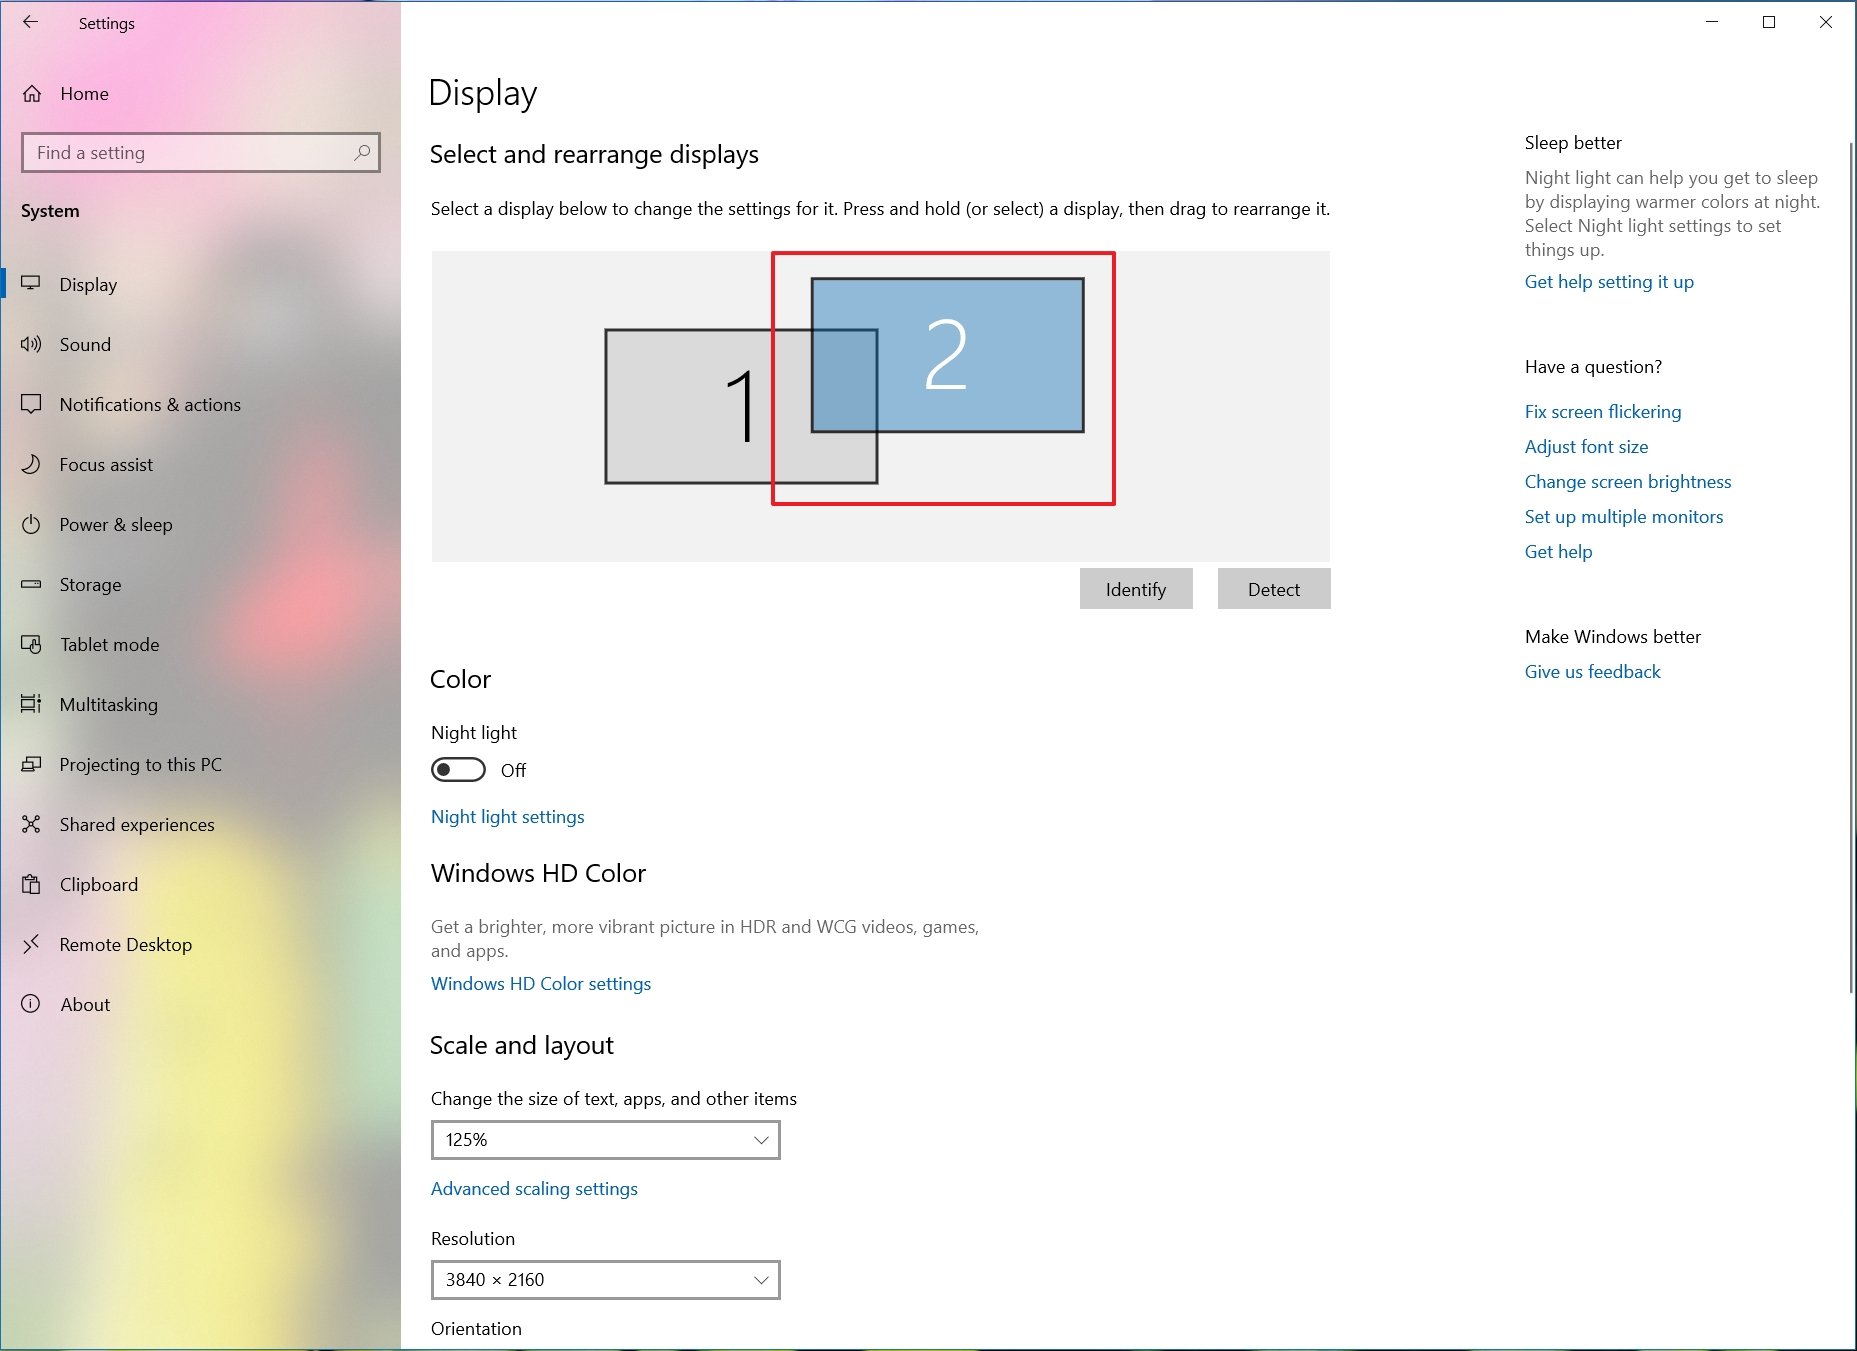
- Click the Apply button.
Once you complete the steps, Windows 10 volition save the concrete layout, and y'all'll exist able to work beyond each display and run apps without issues.
If you're not certain which monitor yous're selecting, click the Identify button to figure out. If one of the monitors isn't showing upward, make sure information technology'due south receiving power and connected correctly, and click the Detect button. In the case that you're however having problems, reset their connections (or restart the computer), and effort the Detect push once again.
How to adjust displays scale and layout on Windows x
When connecting one or multiple displays to a computer, Windows ten does a pretty good job detecting and configuring the most optimal settings. However, depending on your requirements, yous may need to adjust scaling, resolution, and orientation for each monitor.
Selecting right scale
Windows 10 includes settings to adjust the scaling, which are useful when setting upwards various monitors of different sizes and screen resolutions to brand text, apps, and other items expect the aforementioned size across the displays. Or, if you have a 4K brandish, for instance, adjusting the calibration settings tin can help to make items bigger and more than readable.
To select the correct scale setting that suits your requirements, utilize these steps:
- Open up Settings.
- Click on System.
- Click on Display.
- Under the "Select and rearrange displays" department, select the monitor that y'all want to adjust.
- Employ the Change the size of text, apps, and other items drop-down menu to select the advisable calibration option.
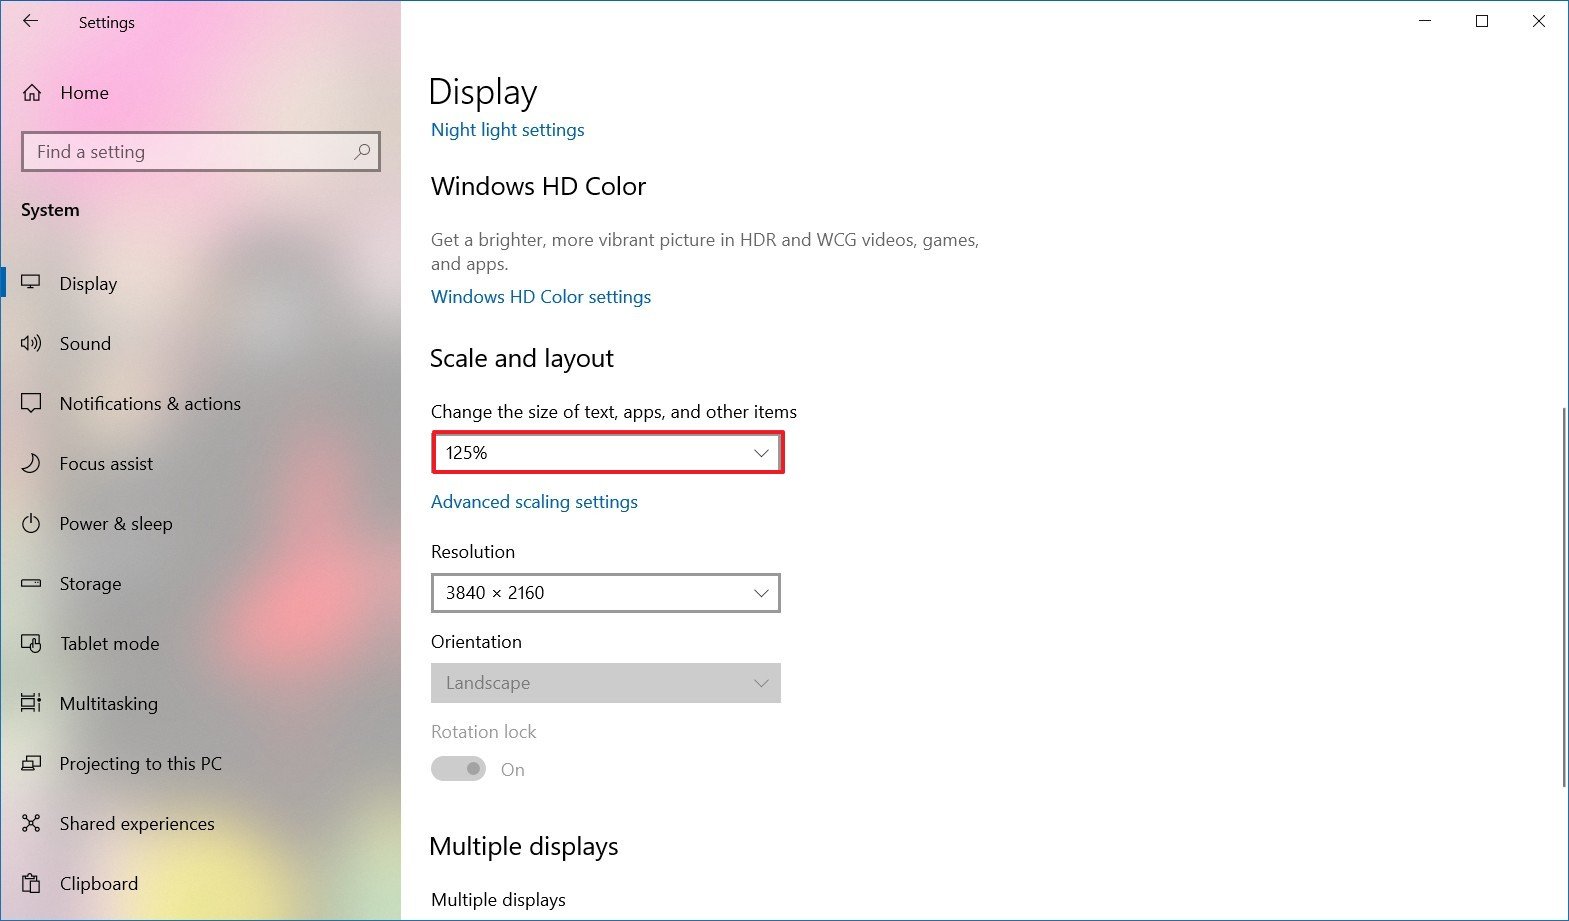
Later on you complete the steps, yous may demand to repeat steps No. 4 and 5 to modify the scaling settings on the other monitors, and so click the Sign-out pick to apply the changes.
While you tin adjust the scaling settings on a per-monitor basis, when possible, information technology'south always all-time to use the same make and model of the monitors with the same configuration. Otherwise, you may run into bug, and Windows 10 may have problems scaling elements.
If you're in the market for a second monitor to aggrandize your laptop or desktop sheet, nosotros recommend the Dell UltraSharp U2719D considering of its accurate color reproduction, size, slim vessel blueprint, VESA mount compatibility, and value.
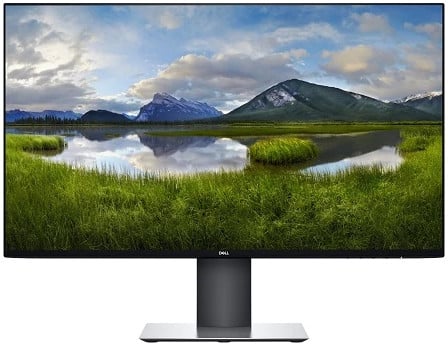
Dell UltraSharp U2719D
A new monitor with everything you need
Dell builds nifty quality monitors, and the U2719D is a adept example. Information technology has everything y'all need, including DisplayPort and HDMI, VESA back up, 27-inch IPS panel with a resolution of 2560x1440 pixels for anything you want to be done.
Custom scaling
To specify a custom scaling value, use these steps:
- Open Settings.
- Click on Organization.
- Click on Display.
- Nether the "Select and rearrange displays" section, select the monitor that y'all want to accommodate.
- Under the "Calibration and layout" section, click the Advanced scaling settings pick.
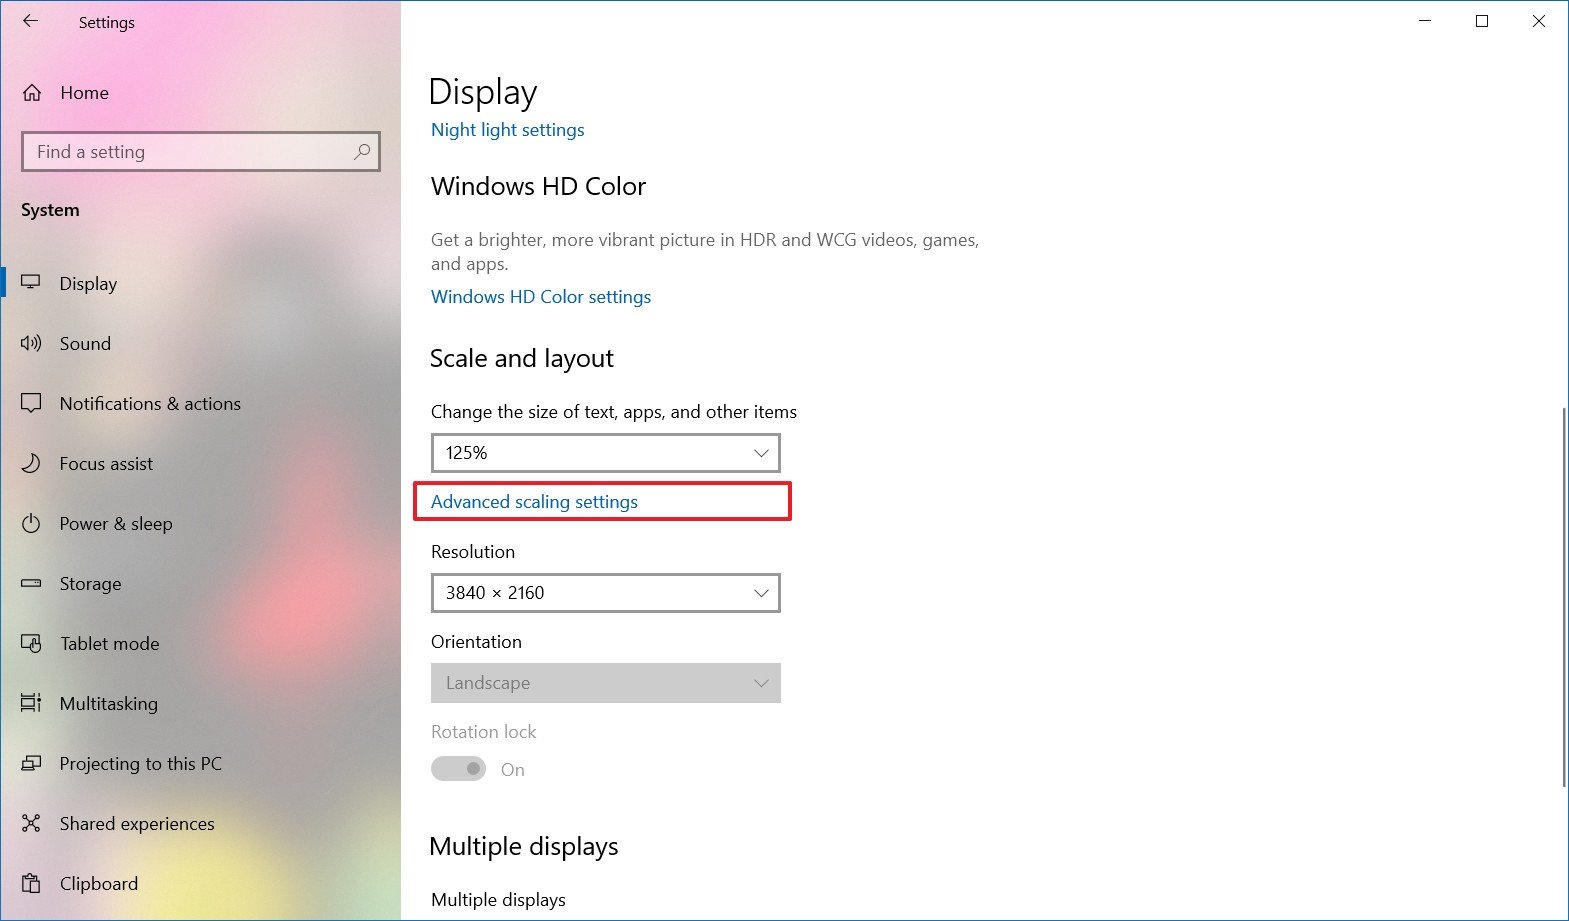
- Under the "Custom scaling" section, specify the scaling size between 100 and 500 percent.
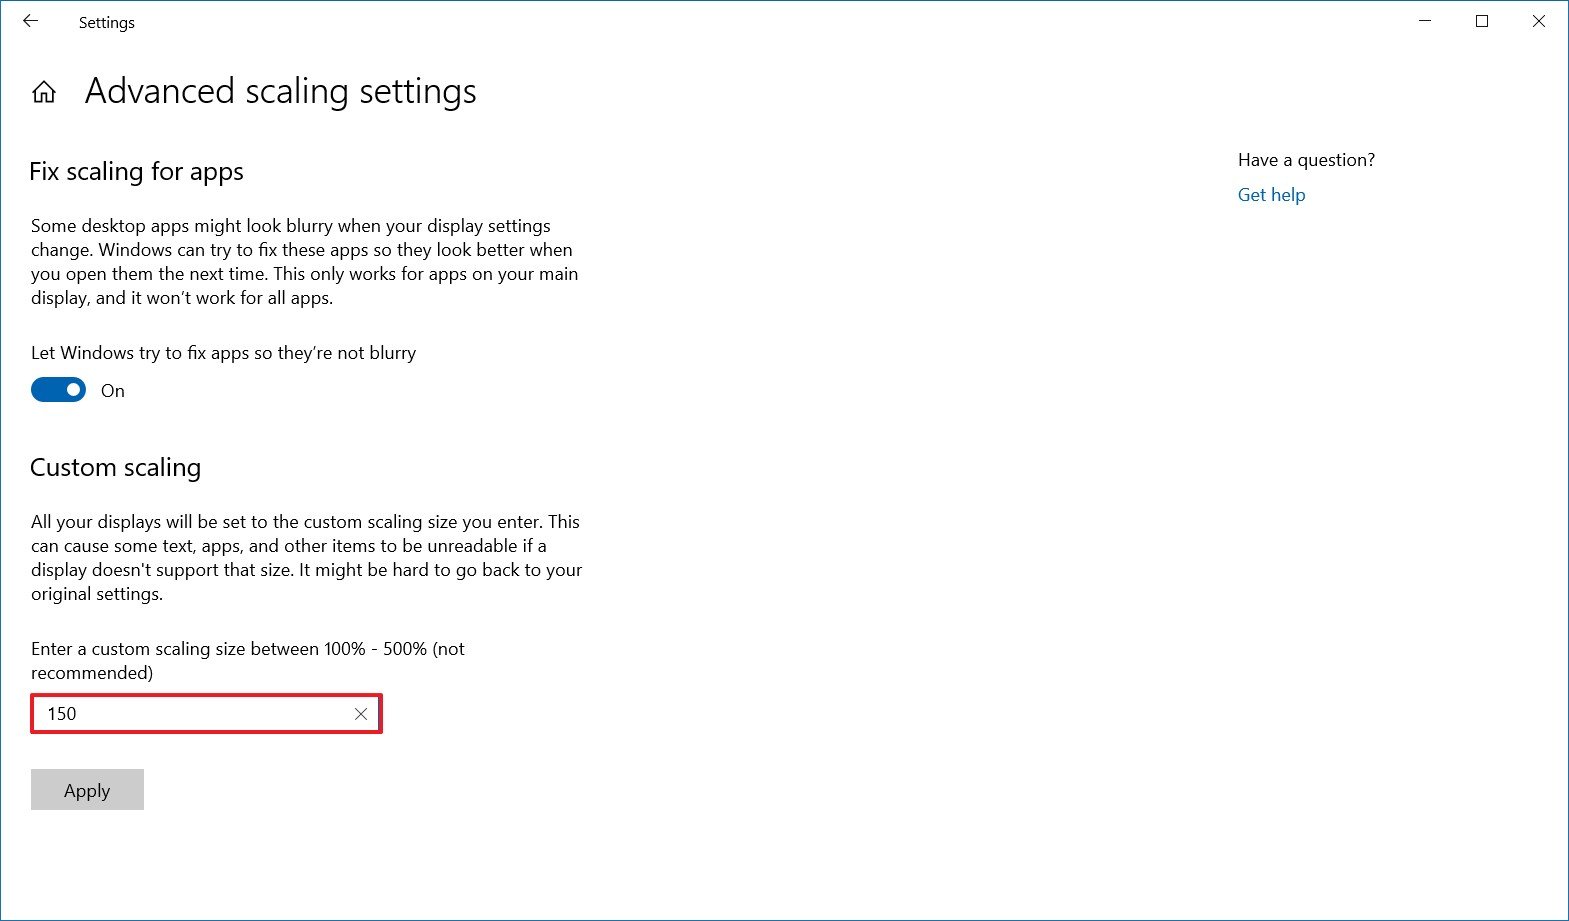
- Click the Utilize button.
Later on y'all complete the steps, sign out of your business relationship and sign back in to examination the new settings. If the new scaling configuration doesn't look right, use the aforementioned steps once more and try a different value until y'all find a comfy setting.
If you want to switch to the predefined calibration settings, you must first turn off custom scaling and sign out. Otherwise, the option will exist grayed out.
Selecting correct resolution
Usually, subsequently connecting a monitor, Windows 10 will set the recommended pixel resolution automatically, simply yous tin can also modify the resolution manually with these steps:
- Open Settings.
- Click on System.
- Click on Display.
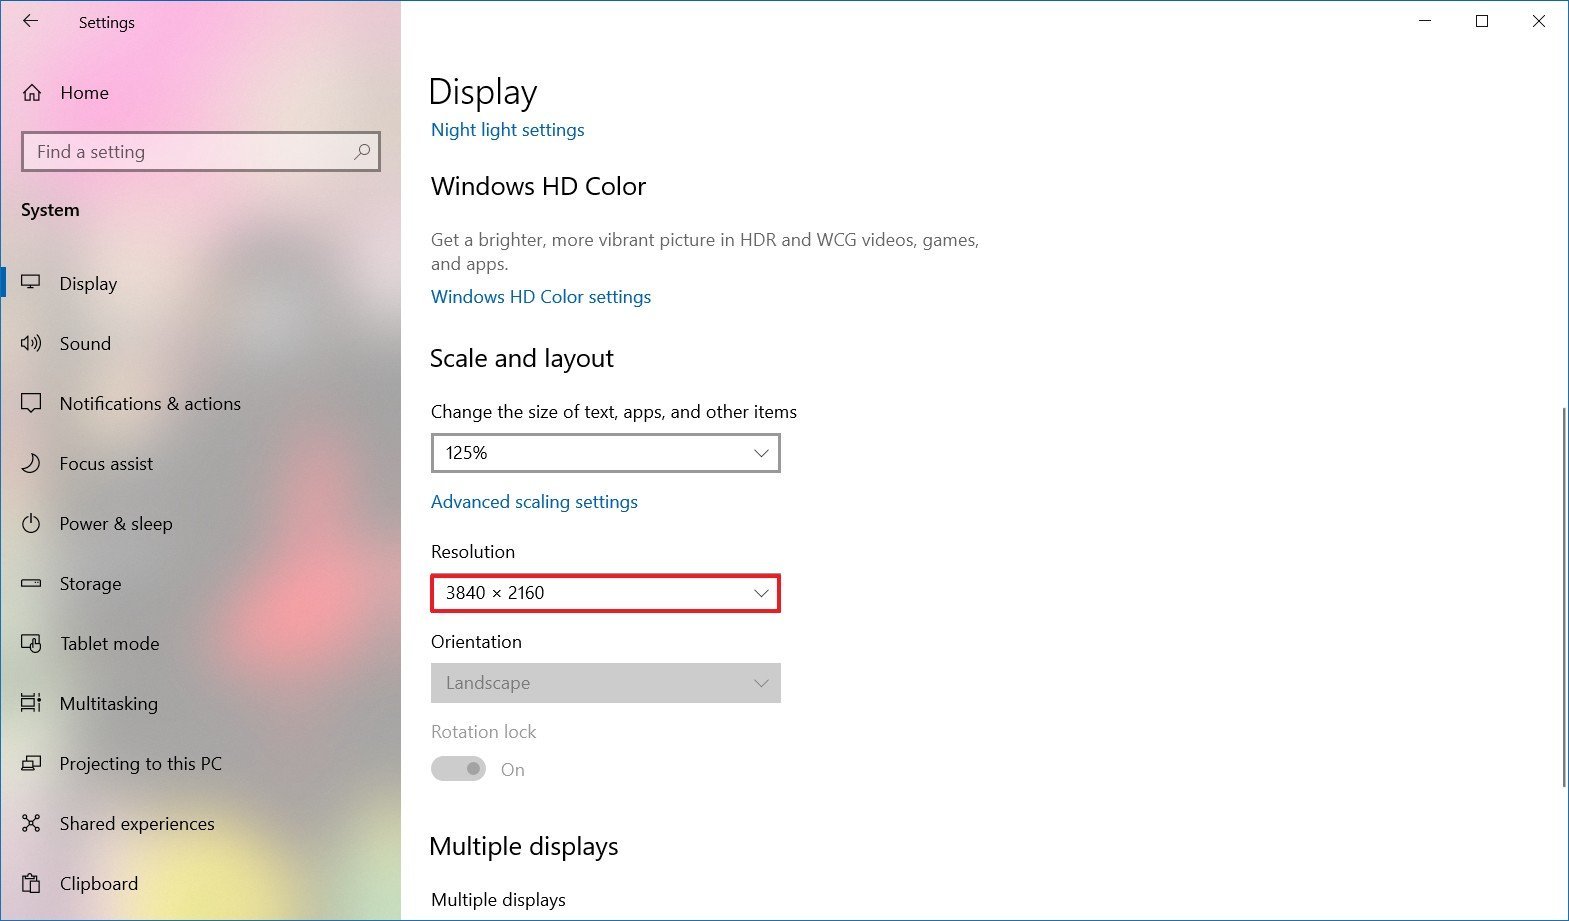
- Nether the "Select and rearrange displays" section, select the monitor that you desire to accommodate.
- Under the "Calibration and layout" section, use the Resolution drop-downwardly carte to select the correct pixel resolution.
Once you complete the steps, echo steps No. 4 and 5 to modify the resolution on the remaining monitors.
If you're looking to make text and other items bigger on the screen, you should be irresolute the scaling settings, not the display resolution.
Selecting right orientation
Windows 10 also allows you lot to rotate the screen horizontally or vertically, which is especially useful when you lot take monitors with stands that rotate, and yous want to employ them with a different orientation for reading or coding.
To change the orientation per-monitor, employ these steps:
- Open up Settings.
- Click on Arrangement.
- Click on Display.
- Under the "Select and rearrange displays" section, select the monitor that you want to adjust.
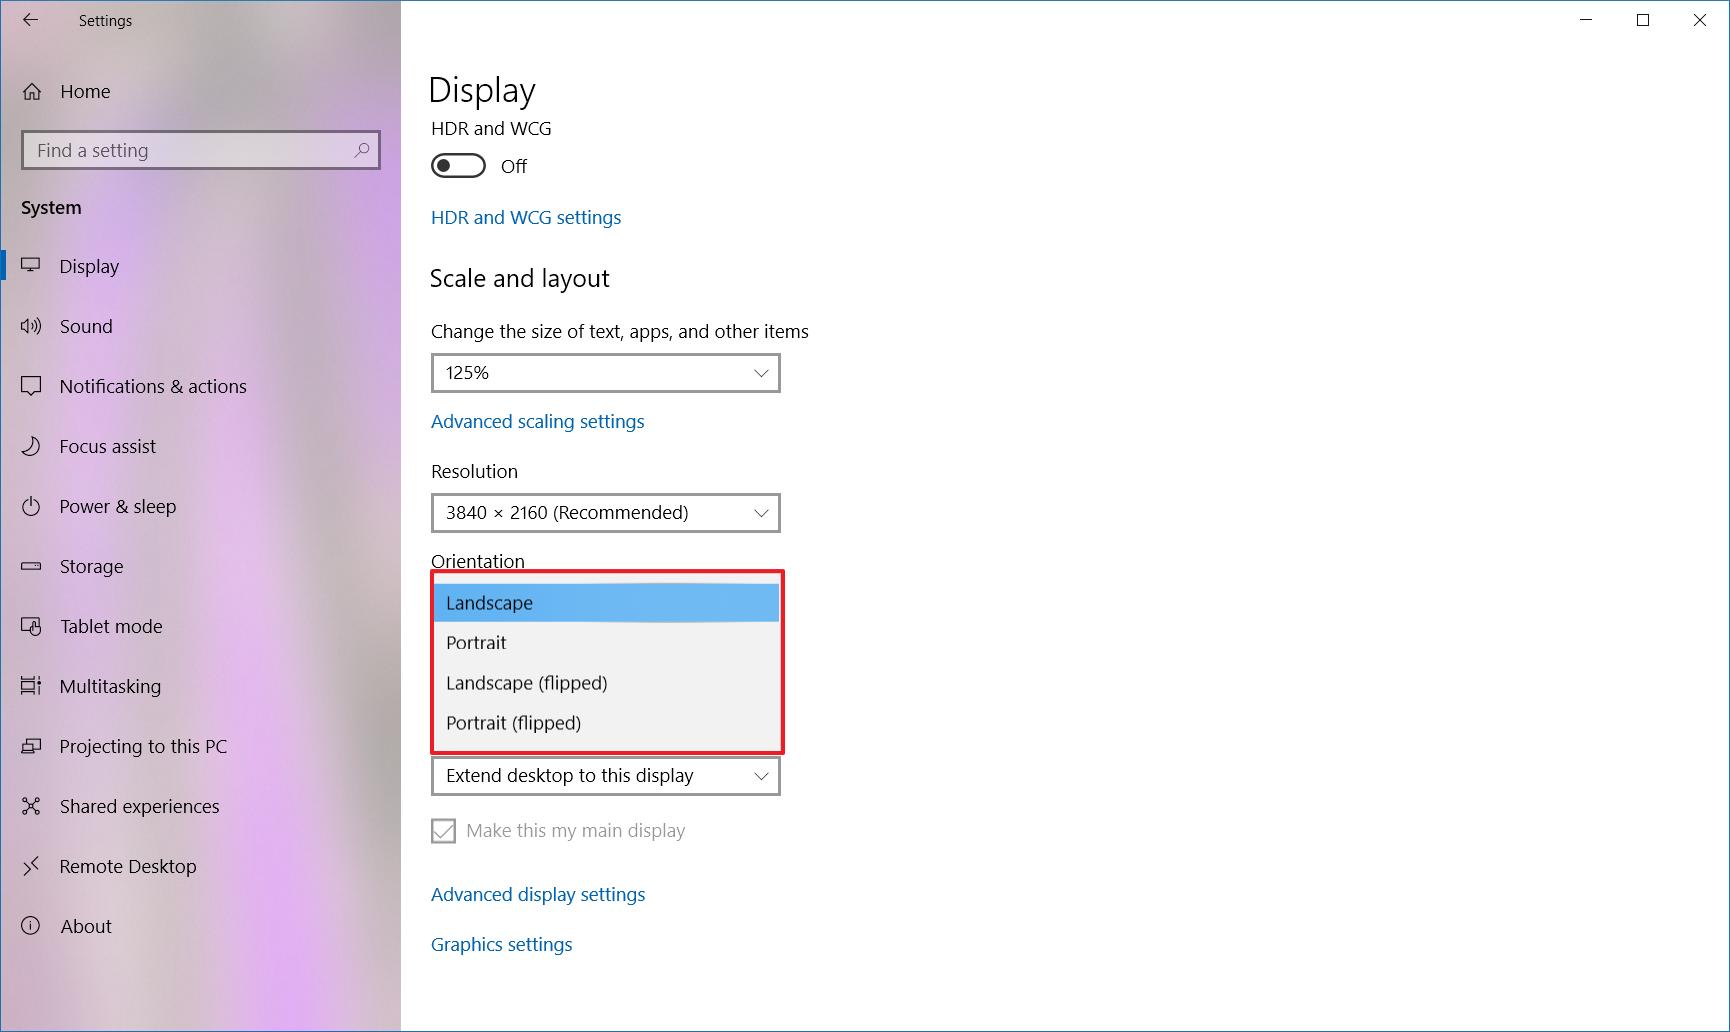
- Under the "Calibration and layout" department, use the Orientation drop-down menu to select the mode:
- Landscape.
- Portrait.
- Mural (flipped).
- Portrait (flipped).
Once you complete the steps, the brandish will shift to the orientation you lot selected.
How to select multiple displays viewing mode on Windows 10
Using the available settings, yous tin also choose the viewing way for your displays. For example, if you're using a second monitor, you tin can aggrandize the main screen to the new display, or you can mirror both monitors, which is an platonic option when showing a presentation. If you're using a laptop with an external monitor, you lot tin can even disable the main display, and but employ the 2d monitor equally your primary.
To modify the viewing mode on Windows 10, apply these steps:
- Open Settings.
- Click on System.
- Click on Display.
- Nether the "Select and rearrange displays" department, select the monitor that you desire to conform.
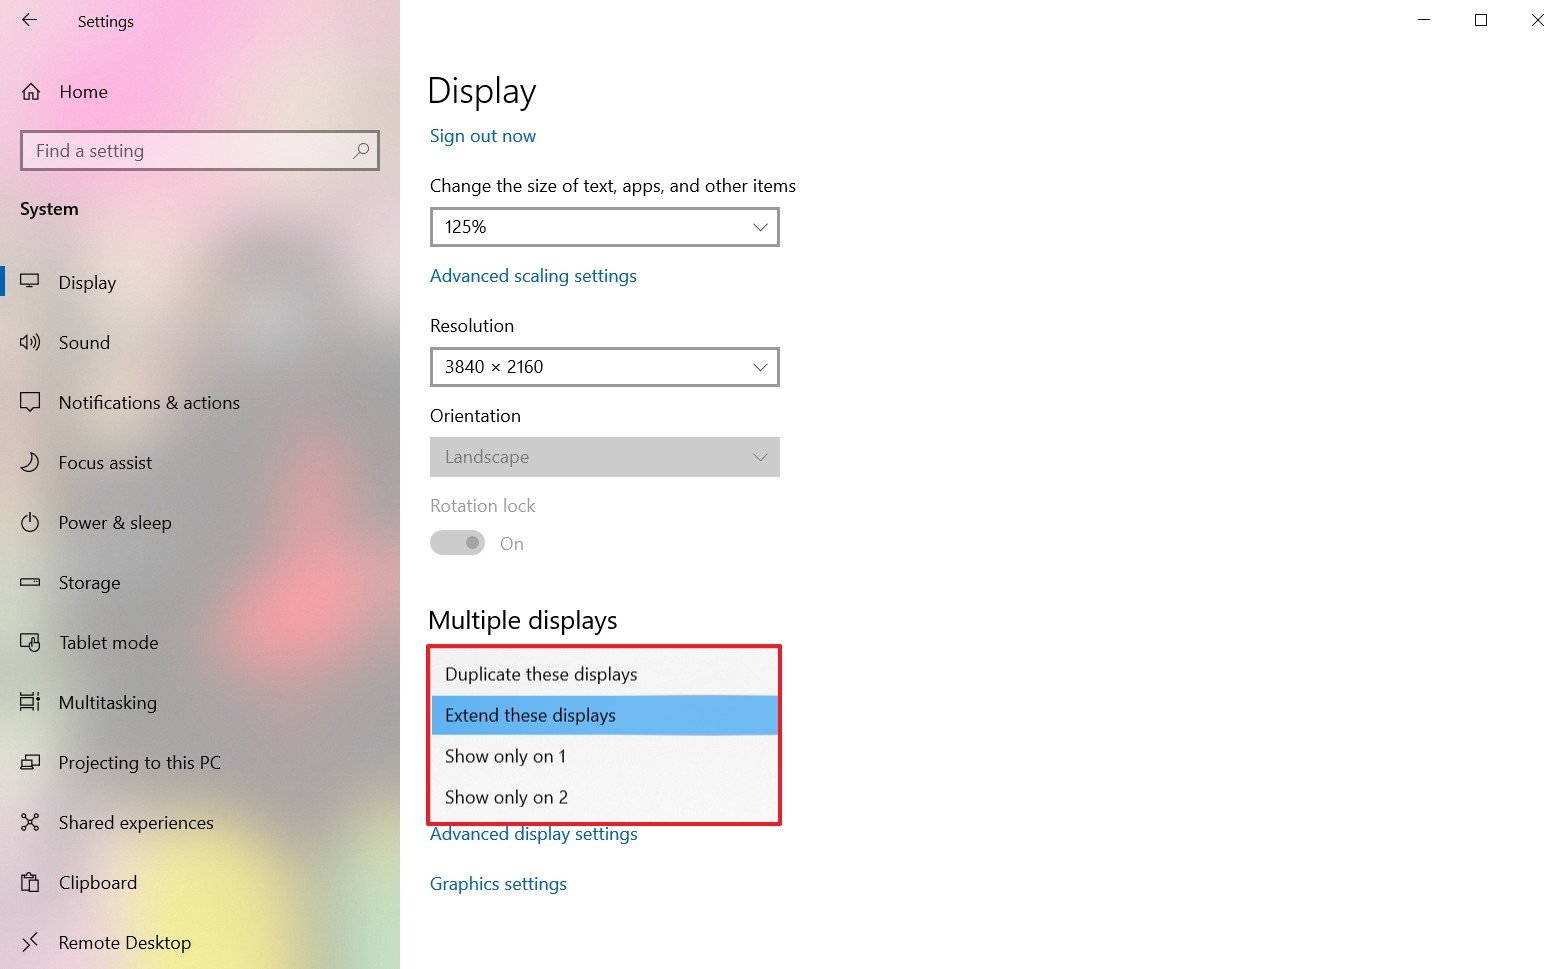
- Under the "Multiple displays" section, use the driblet-down bill of fare to fix the appropriate viewing fashion:
- Duplicate desktop — Shows the same desktop on both displays.
- Extend — Expands the master desktop to the secondary display.
- Disconnect this brandish — Turn off the selected monitor.
After you complete the steps, you may demand to repeat steps No. 4 and 5 to set the display mode on the remaining monitors. Also, annotation that using these settings, you tin can make any of the monitors as your primary brandish.
Switching brandish modes with shortcut
In addition to using the Settings app, Windows 10 also allows you to switch display modes on the wing using the Project characteristic, which you can access using the Windows key + P keyboard shortcut.
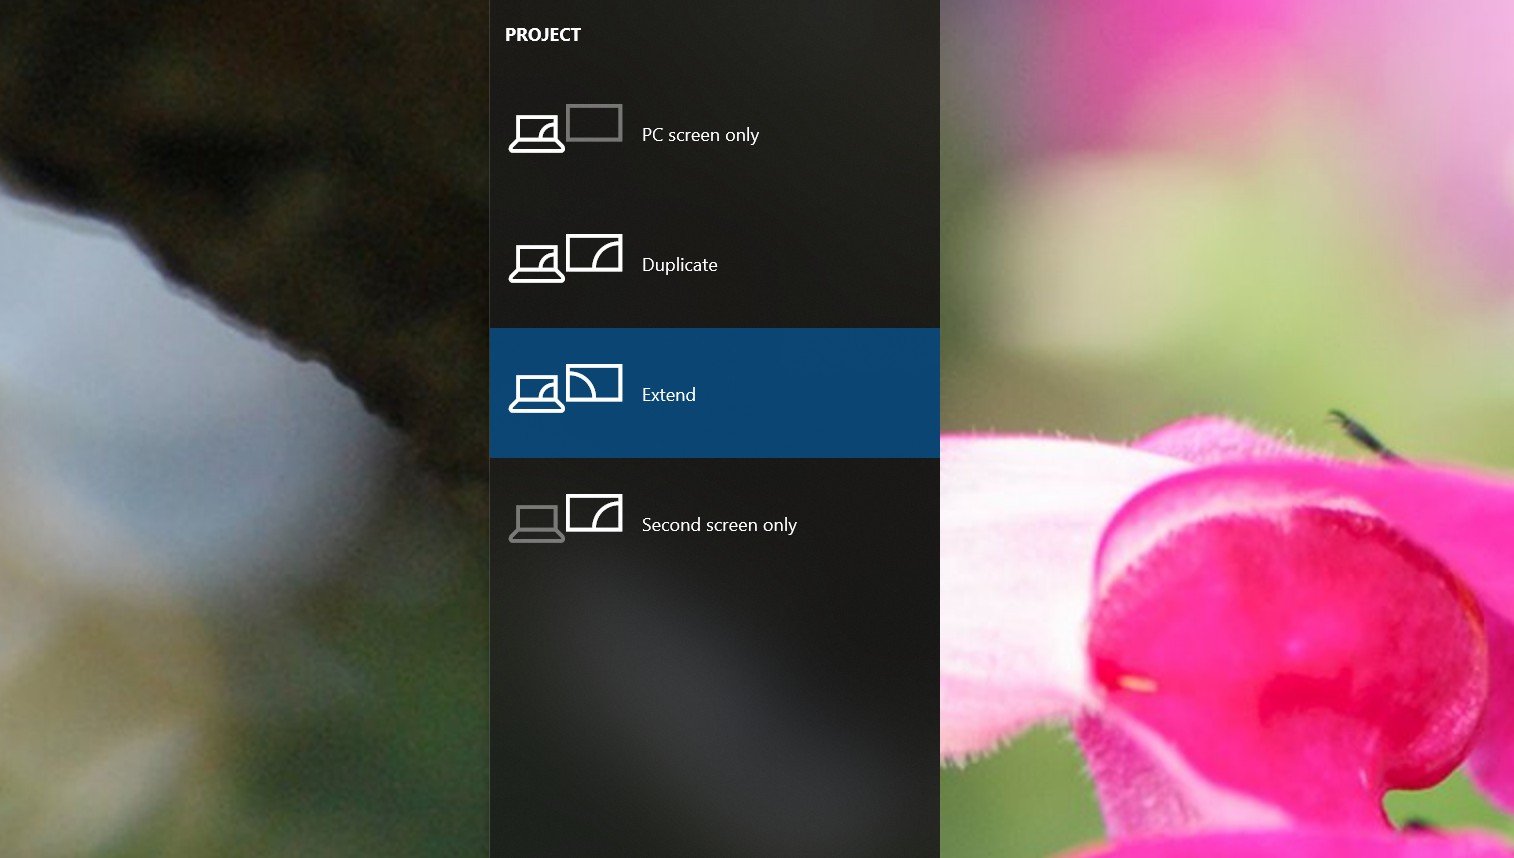
Once you invoke the shortcut, a flyout volition open up from the right side with four options, including:
- PC screen only — Simply the principal display is used.
- Duplicate — Secondary displays will mirror the primary monitor.
- Extend — Both screens are combined to offer an extended desktop.
- Second screen only — Only the secondary displays is used.
Typically, when using a multi-monitor setup on a desktop or laptop, yous want to employ the "Extend" option. This allows yous to use the main monitor unremarkably and the secondary monitors at their native resolution creating a unmarried big canvas.
Duplicate is a good option when using a second monitor or projector to show a presentation. In contrast, the 2d screen only option is great when you want to shut the lid on a laptop and work only with the external monitor.
How to manage advanced brandish settings on Windows x
Although it's not always recommended to modify your advanced brandish settings, because non all monitors are created equal, sometimes, you may need to make a few adjustments to improve color accuracy and remove screen flickering.
Of import: We only recommend adjusting the advanced settings if yous have a rough idea of what to exercise. Typically, you should exist fine with the default display settings.
Setting a custom colour profile
If your monitors aren't rendering the colors accurately, you can apply a custom color contour to amend colour accuracy using these steps:
- Open Settings.
- Click on System.
- Click on Display.
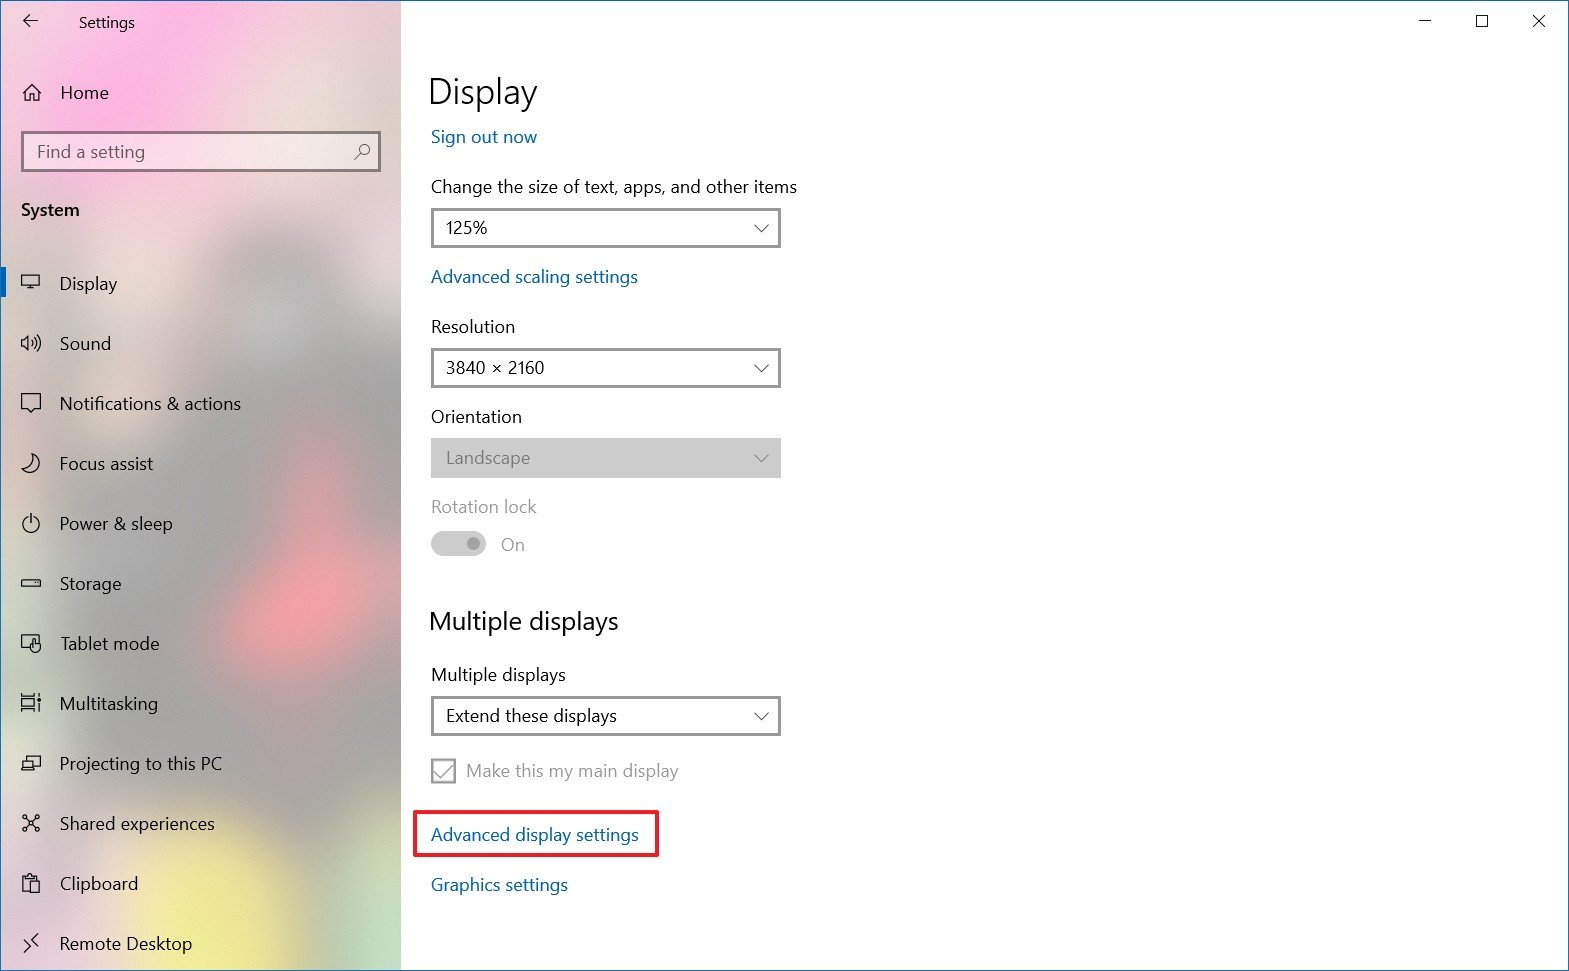
- Click the Advanced display settings pick.
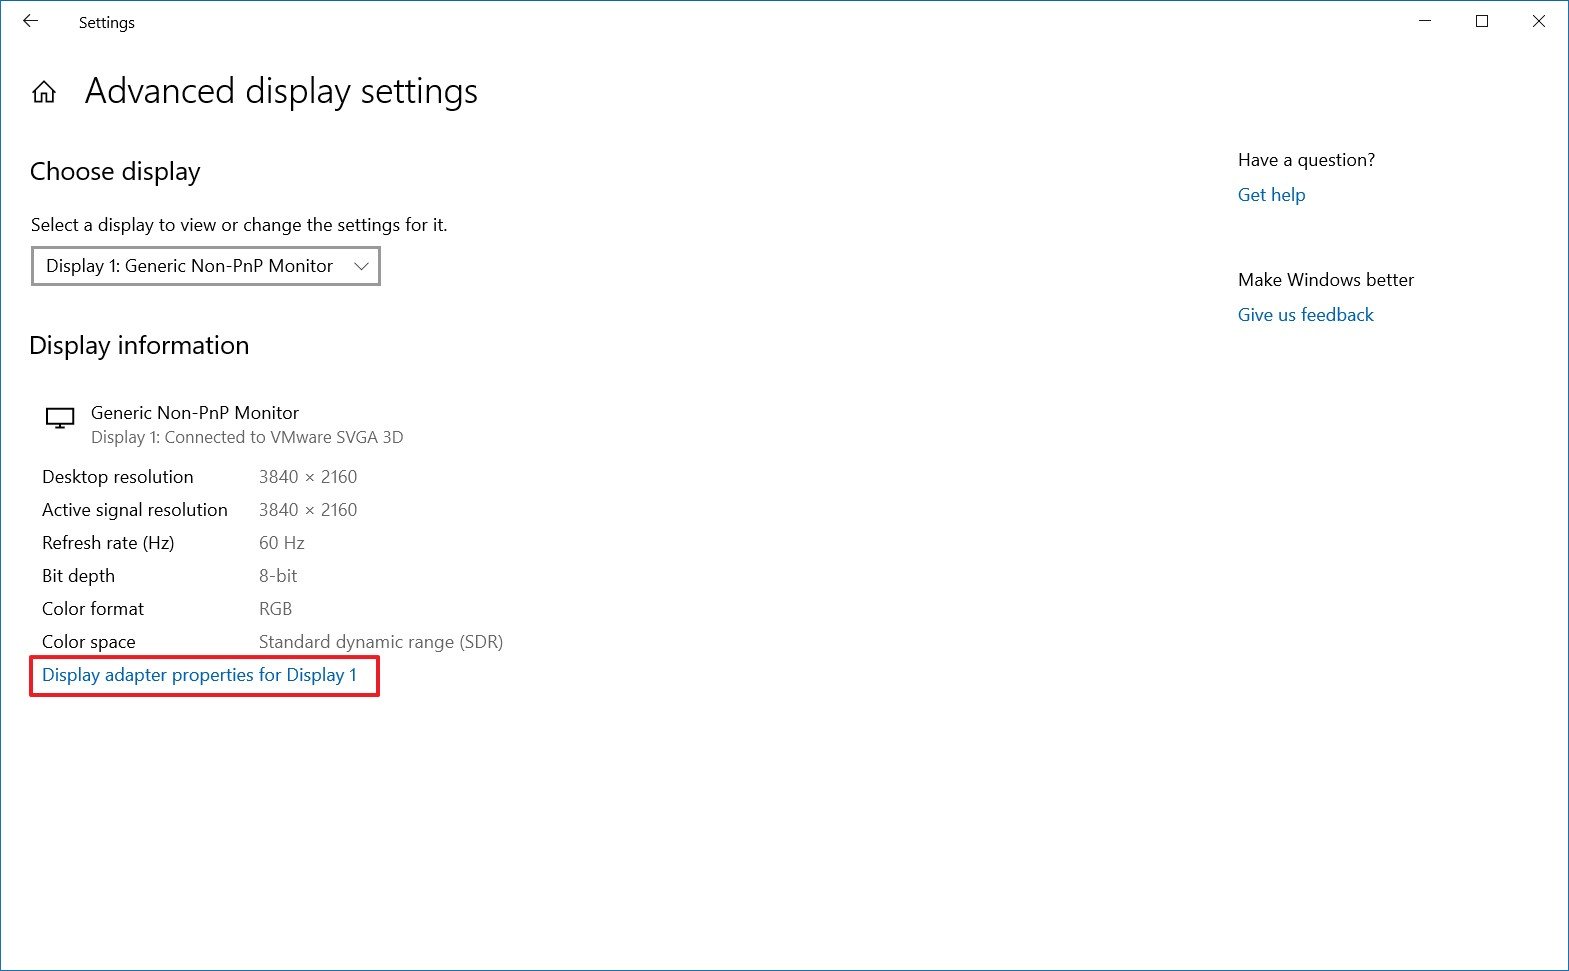
- Click the Display adapter properties pick for the brandish that you want to set up a custom color profile.
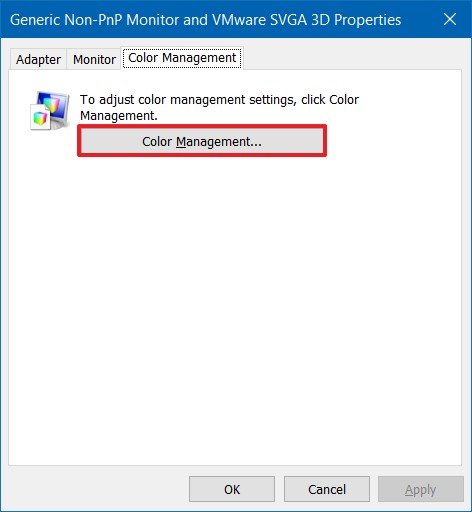
- Click the Colour Management tab.
- Click the Color Management push button.
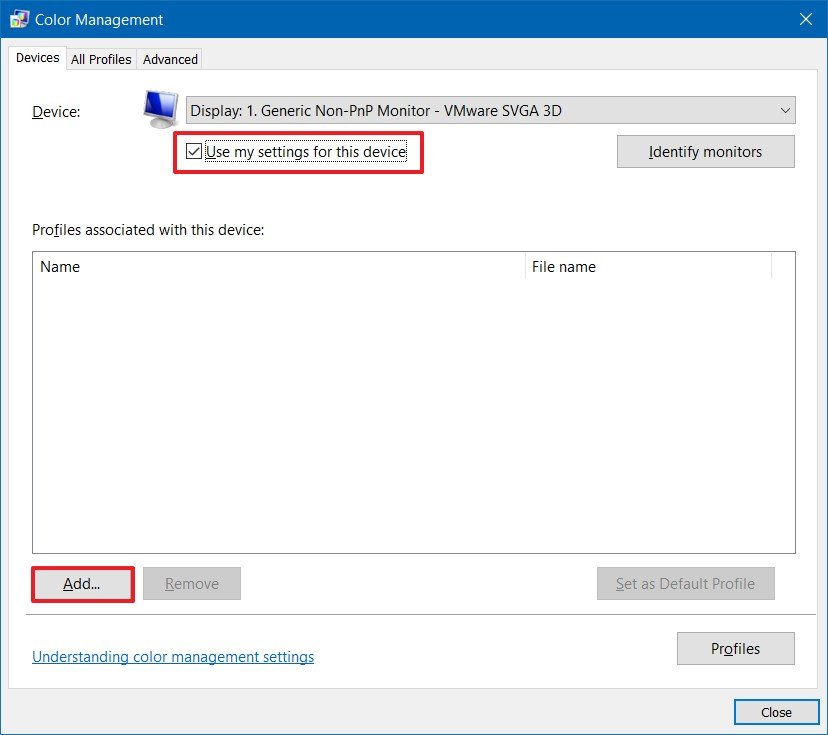
- Click the Devices tab.
- Select a brandish from the list.
- Bank check the Use my settings for this brandish option.
- Click the Add push.
- On the "Associate Colour Profile" folio, click the Browse button and locate the new color profile.
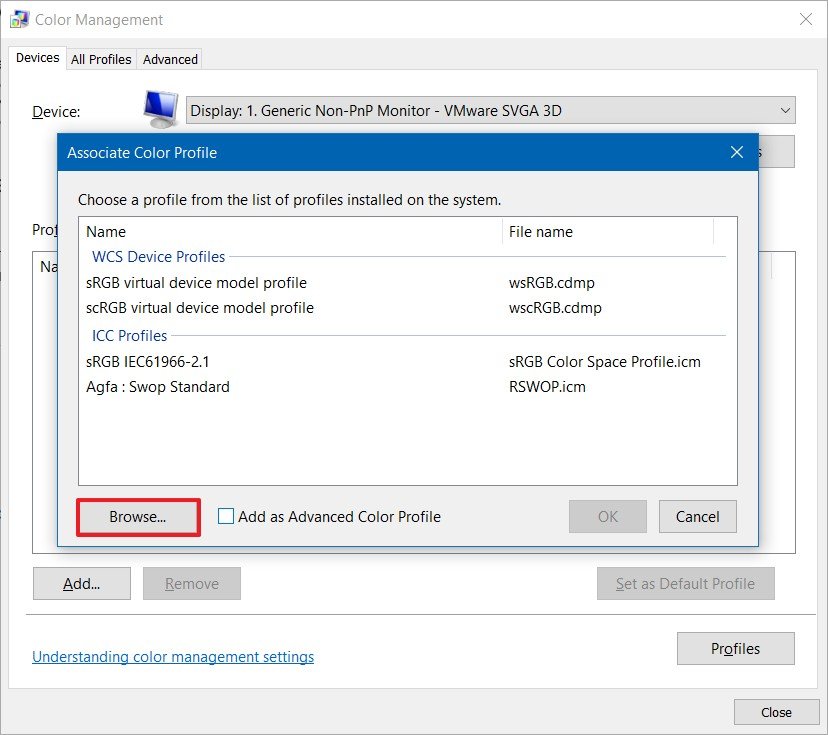
- Double-click the .icm file to install the new contour.
- Click the Shut push.

In one case y'all complete the steps, you may demand to echo steps No. 9 through 13 to set a custom profile for the other monitors.
When configuring a custom color profile, you should apply those created past your display manufacturer or from a trusted source. If you're non sure, you can use these steps to download the correct color profile for your monitors.
Changing the refresh rate
Ordinarily, a refresh rate (frames per second) of 59Hz or 60Hz is more than plenty to operate a calculator, though yous'll definitely want to look at the best monitors for Xbox Series Ten and Series S if y'all plan to game at higher framerates. However, if you're noticing screen flickering, or if you have monitors that support a higher refresh rate, bumping the settings can provide a better and smoother viewing experience — particularly for gamers.
To suit the refresh charge per unit of a monitor, apply these steps:
- Open Settings.
- Click on Organization.
- Click on Display.
- Click the Advanced display settings option.
- Click the Display adapter backdrop option for the display you want to change the refresh rate.
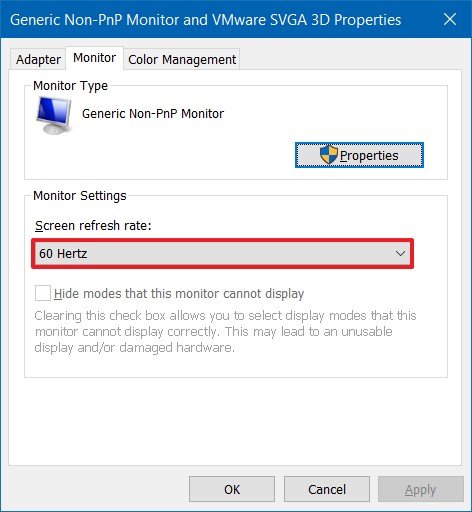
- Click the Monitor tab.
- Under the "Monitor Settings" section, use the driblet-down carte to set the correct refresh charge per unit.
After you complete the steps, y'all may need to repeat steps No. 5, six, and 7 to change the refresh charge per unit on the remaining monitors.
How to show taskbar across multiple displays on Windows 10
On a multi-monitor setup, the taskbar past default volition appear merely in the primary brandish, only you lot tin modify the settings to testify it across all the displays using these steps:
- Open Settings.
- Click on Personalization
- Click on Taskbar.
- Under the "Multiple brandish" department, plough on the Show taskbar on all displays toggle switch.
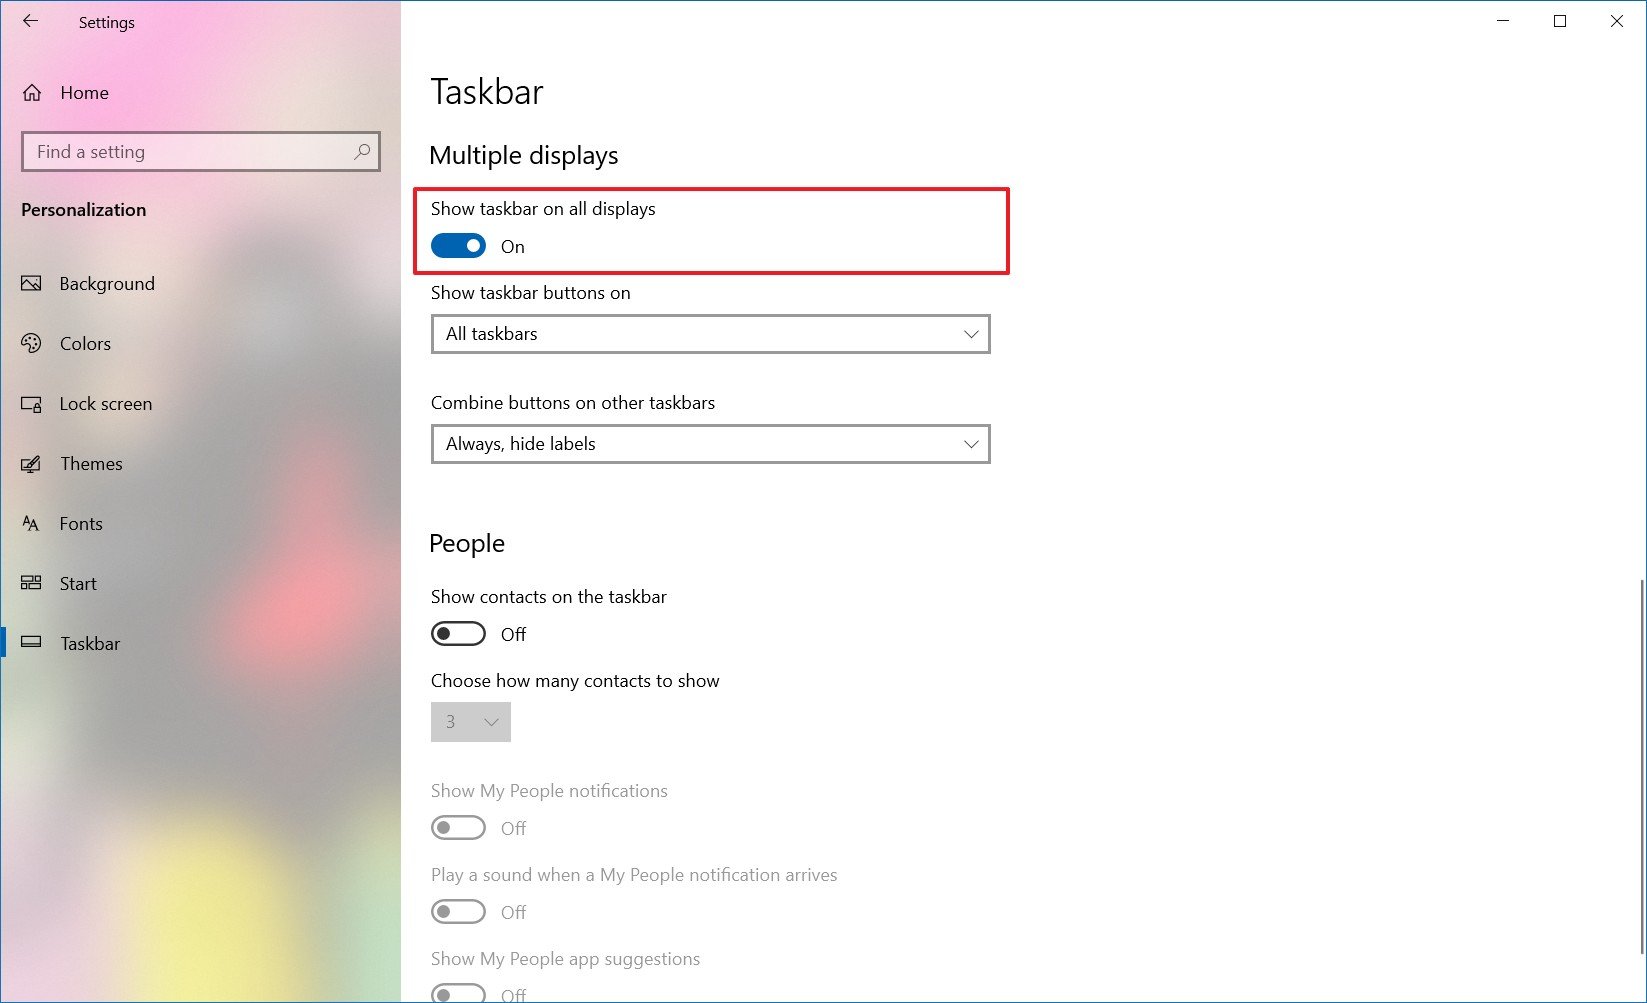
If you want to control in which taskbar the buttons for running apps should appear, so use the Show taskbar button on the drib-downward menu and select i of the bachelor options:
- All taskbars.
- Main taskbar and taskbar where window is open.
- Taskbar where window is open.
Likewise, you can utilise this guide to optimize the space on the taskbar to pin even more apps or to keep it as minimal equally possible.
How to change background on multiple displays on Windows x
Windows x offers a lot of settings to adapt the look and experience of the desktop, but when using multiple monitors, setting up different background images on each brandish is i the most pregnant customization that you can make to personalize your experience.
To show different wallpapers on a multi-monitor setup using a slideshow, employ these steps:
- Open Settings.
- Click on Personalization.
- Click on Background.
- Employ the "Groundwork" driblet-down menu and select the Slideshow option.
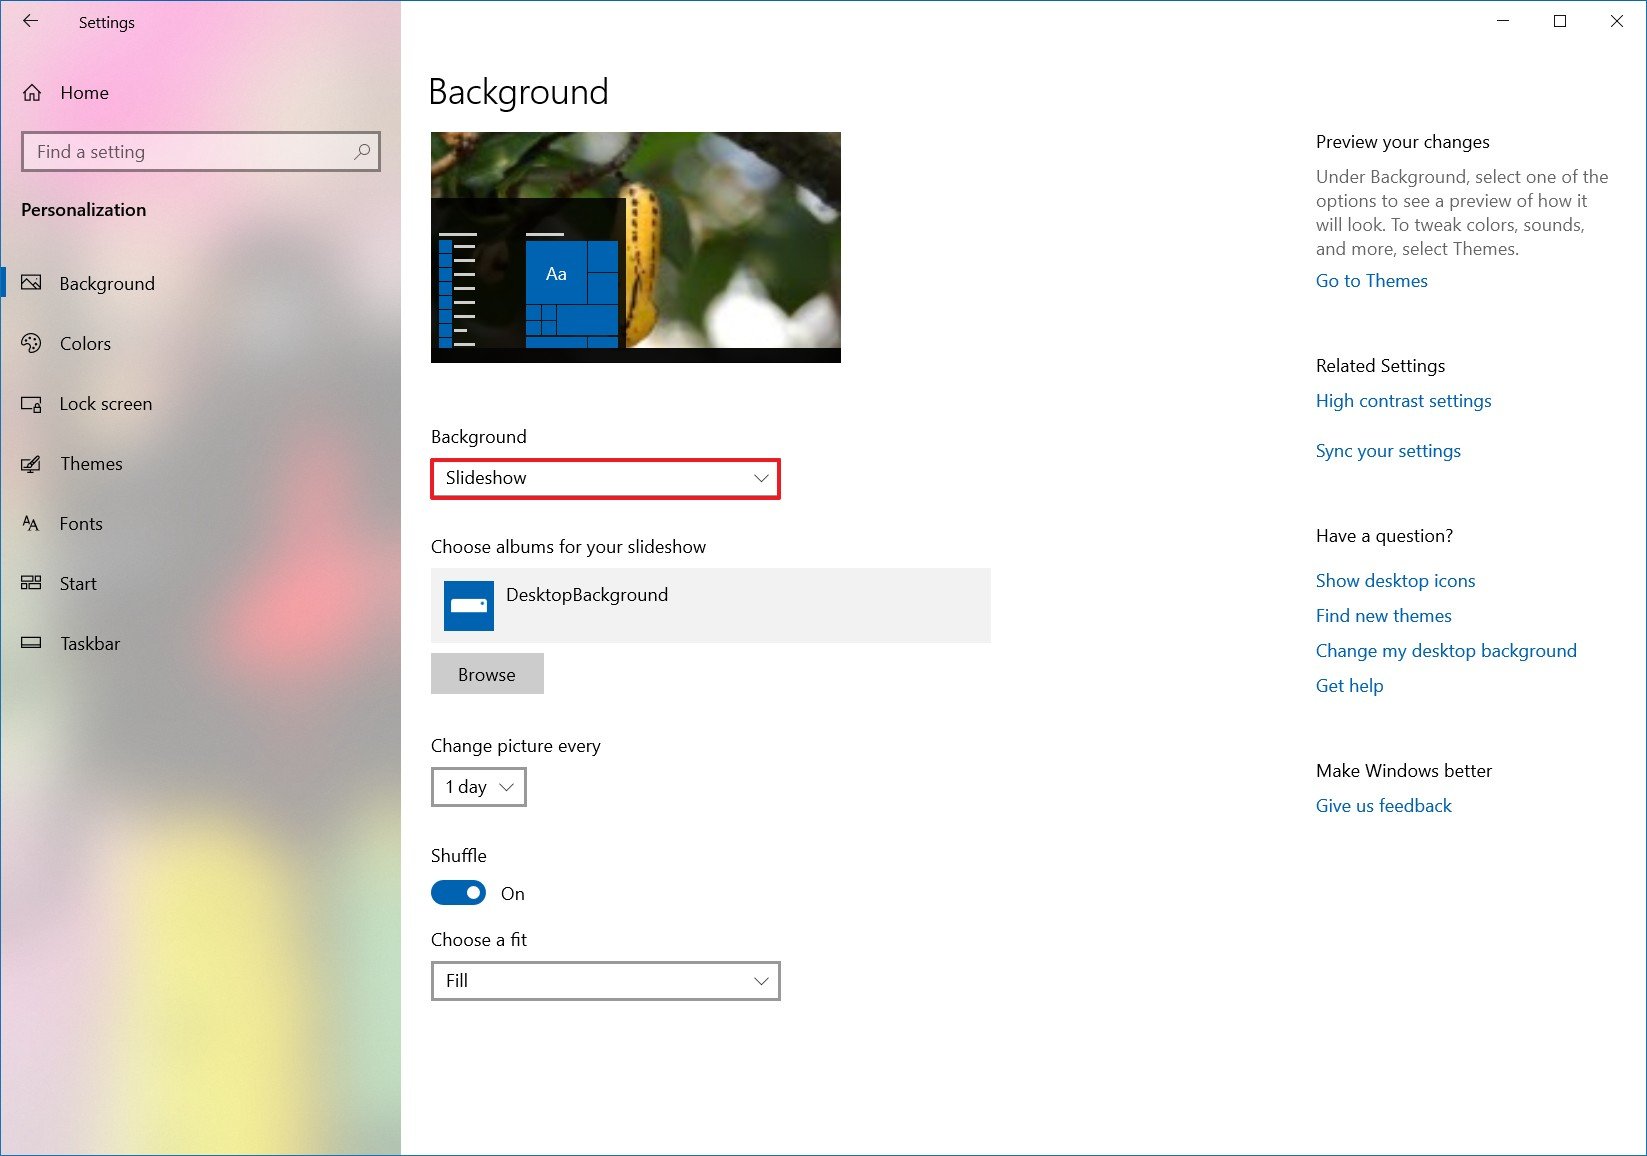
- Click the Browse button.
- Select a folder with a collection of images that you'd similar to brandish on the monitors.
- Click the Choose this folder button.
- Use the "Alter picture every" drop-down menu to select the rotation frequency.
- Turn on the Shuffle toggle switch.
- (Optional) If you're using different sized images, use the Choose a fit drop-down carte and select the Make full option.
Once y'all complete the steps, the images will rotate on the desktop background using the rotation frequency that you selected.
Customizing each monitor with a different background
If you want to set a different background paradigm for each monitor, utilize these steps:
- Open Settings.
- Click on Personalization.
- Click on Background.
- Use the "Groundwork" drib-down card and select the Pic option.

- Click the Browse button.
- Select the wallpaper and click the Cull picture option.
- Right-click the epitome and select the monitor you want the wallpaper to show.
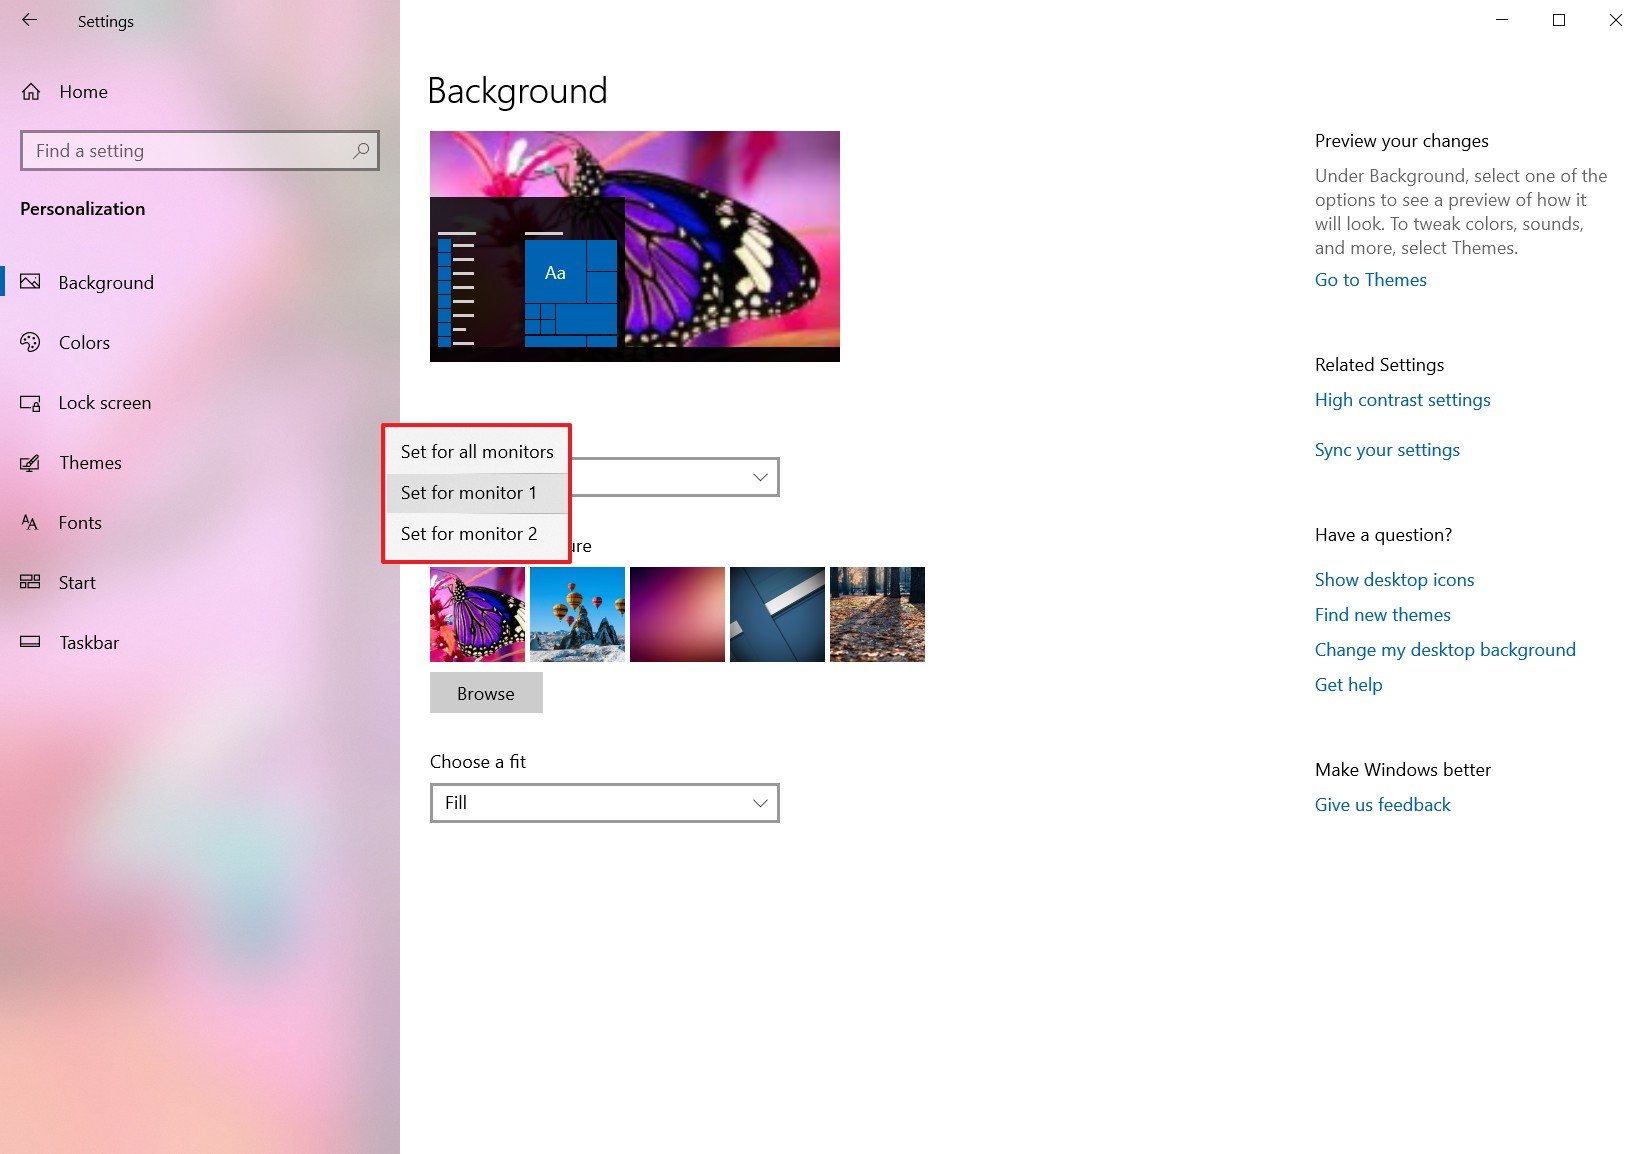
- Echo steps No. five, half dozen, and seven to set a custom background for another monitor.
After you complete the steps, each monitor will display a custom wallpaper.
In addition to the instructions outlined above, here are a few boosted tips to keep in mind when setting upwards a computer with multiple monitors. For instance, unless it'south a laptop, y'all shouldn't try to arrange the brightness or colour using Windows ten or another application. Instead, you should apply the controls built into the monitor.
In the case that the second monitor isn't getting detected, check its connections, and use the Find push in the Settings app. If you're all the same having issues, you tin apply this guide to troubleshoot and fix common issues.
Finally, when using one or multiple monitors, you may come across a black screen, which it'due south typically a video driver related problem. If you're not sure how to fix this issue, y'all can follow these steps to resolve the problem.
Source: https://www.windowscentral.com/how-connect-and-set-multiple-monitors-windows-10
Posted by: morrisonimente35.blogspot.com
0 Response to "How To Set Up Two Screens On Windows"
Post a Comment